1 - Wagons
 Make a coupler with a Märklin 56101 (type I) hook for LGB wagons. Make a coupler with a Märklin 56101 (type I) hook for LGB wagons.
 Maak een koppeling met een Märklin 56101 (schaal I) koppelingshaak voor LGB-wagons. Maak een koppeling met een Märklin 56101 (schaal I) koppelingshaak voor LGB-wagons.
 Faites un accouplement avec un attelage Märklin 56101 (échelle I) pour des wagons LGB. Faites un accouplement avec un attelage Märklin 56101 (échelle I) pour des wagons LGB.
|
|
|
|
|
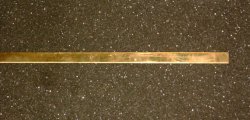
 A brass strip of 10x1 mm (1"=25.4 millimeters (mm)). A brass strip of 10x1 mm (1"=25.4 millimeters (mm)).
 Een messing strip van 10x1 mm. Een messing strip van 10x1 mm.
 Une bande laiton de 10x1 mm. Une bande laiton de 10x1 mm.
|
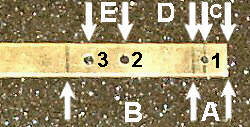
A=10 mm
B=35 mm
C=7 mm
D=20 mm
E=10mm
|
|
 Drill 3 holes at the indicated positions. 1 is 2.5 mm, 2 and 3 are 3-3.5 mm. Hole nr 3 isn't really necessary, but can be used to prevent any turning-movement of the coupler on its mounting. Drill 3 holes at the indicated positions. 1 is 2.5 mm, 2 and 3 are 3-3.5 mm. Hole nr 3 isn't really necessary, but can be used to prevent any turning-movement of the coupler on its mounting.
 Boor 3 gaten op de aangegeven posities. Gat 1 is 2,5 mm, de gaten 2 en 3 zijn 3-3,5 mm. Gat nr 3 is per se nodig, maar kan worden gebruikt om verdraaien van de koppeling te voorkomen. Boor 3 gaten op de aangegeven posities. Gat 1 is 2,5 mm, de gaten 2 en 3 zijn 3-3,5 mm. Gat nr 3 is per se nodig, maar kan worden gebruikt om verdraaien van de koppeling te voorkomen.
 Percez 3 troues, comme indiqués. No 1 est 2,5 mm, les 2 et 3 sont 3-3,5 mm. Le trou no 3 n'est pas directement nécessaire, mais peut éviter que l'attelage tourne sur sa base. Percez 3 troues, comme indiqués. No 1 est 2,5 mm, les 2 et 3 sont 3-3,5 mm. Le trou no 3 n'est pas directement nécessaire, mais peut éviter que l'attelage tourne sur sa base.
|
|
|
|
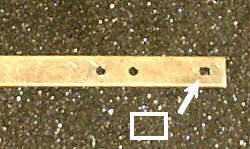
 File the hole until it's rectangular and the Märklinhook fits exactly. File the hole until it's rectangular and the Märklinhook fits exactly.
 Vijl het gat rechthoekig uit, tot de Märklinhaak er precies inpast. Vijl het gat rechthoekig uit, tot de Märklinhaak er precies inpast.
 Limez le trou jusqu'à ce soit rectangulair et le crochet Märklin s'emboit exactement Limez le trou jusqu'à ce soit rectangulair et le crochet Märklin s'emboit exactement
|
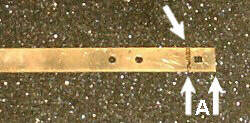
A=10 mm
|
|
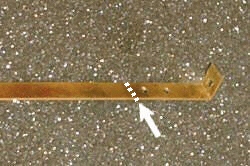
 Make a small cut to make folding easier. Make a small cut to make folding easier.
 Zaag iets in om het vouwen te vereenvoudigen. Zaag iets in om het vouwen te vereenvoudigen.
 Coupez un peu pour mieux plier. Coupez un peu pour mieux plier.
|
|
|
|
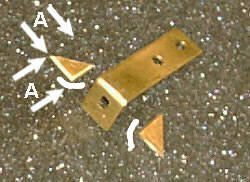
 Cut off left of B in photo 2. Cut off left of B in photo 2.
 Zaag af, links van B in foto 2. Zaag af, links van B in foto 2.
 Coupez à gauche de B de la photo 2. Coupez à gauche de B de la photo 2.
|
A=10 mm
|
|
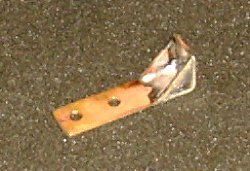
 Round off the straight angle of the triangular parts a little and solder them all together. Round off the straight angle of the triangular parts a little and solder them all together.
 Rond de rechte hoek van de driehoekige onderdelen iets af en soldeer alles in elkaar. Rond de rechte hoek van de driehoekige onderdelen iets af en soldeer alles in elkaar.
 Arrondissez l'angle droit de la partie triangulaire un peu et soudez le tout ensemble. Arrondissez l'angle droit de la partie triangulaire un peu et soudez le tout ensemble.
|
|
|
|
|
|
|
|
|
|
|
|
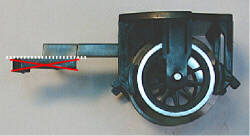
 Flatten the original LGB couplerbase... Flatten the original LGB couplerbase...
 Vijl de montageboom voor de originele LGB-koppeling vlak... Vijl de montageboom voor de originele LGB-koppeling vlak...
 Aplanissez la position de montage original... Aplanissez la position de montage original...
|
|
|
|
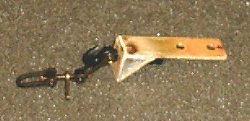
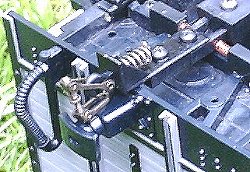
 ...drill two 2 mm holes in the remains of the couplerbase and mount the new coupler. ...drill two 2 mm holes in the remains of the couplerbase and mount the new coupler.
 ...boor 2 gaatjes van 2 mm in de montageboom en monteer je eigen koppeling. ...boor 2 gaatjes van 2 mm in de montageboom en monteer je eigen koppeling.
 ...percez 2 trous de 2 mm dans la base et montez votre propre attelage. ...percez 2 trous de 2 mm dans la base et montez votre propre attelage.
|
|
|
|
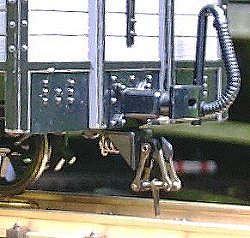
 It is possible that the handle is hanging too low, so see to it that it is turned horizontal or upwards. So not downwards as on the picture It is possible that the handle is hanging too low, so see to it that it is turned horizontal or upwards. So not downwards as on the picture
 De draaihendel kan te laag hangen. Zorg ervoor dat deze naar opzij of omhoog is gedraaid. Dus niet omlaag hangt, zoals op de foto. De draaihendel kan te laag hangen. Zorg ervoor dat deze naar opzij of omhoog is gedraaid. Dus niet omlaag hangt, zoals op de foto.
 C'est possible que la manette vient trop bas. Puis tournez la à la coté ou en haut, pas en bas, comme dans la photo. C'est possible que la manette vient trop bas. Puis tournez la à la coté ou en haut, pas en bas, comme dans la photo.
|
2 - Locs/Loks/Locos
 Make a coupler with a Märklin 56101 (type I) hook for LGB locs. Make a coupler with a Märklin 56101 (type I) hook for LGB locs.
 Maak een koppeling met een Märklin 56101 (schaal I) koppelingshaak voor LGB-loks. Maak een koppeling met een Märklin 56101 (schaal I) koppelingshaak voor LGB-loks.
 Faites un accouplement avec un attelage Märklin 56101 (échelle I) pour des locos LGB. Faites un accouplement avec un attelage Märklin 56101 (échelle I) pour des locos LGB.
|
|
|
|

|
 A brass strip of 10x1 mm (1"=25.4 millimeters (mm)). A brass strip of 10x1 mm (1"=25.4 millimeters (mm)).
 Een messing strip van 10x1 mm. Een messing strip van 10x1 mm.
 Une bande laiton de 10x1 mm. Une bande laiton de 10x1 mm.
|
A=20 mm
B=10 mm
|
|
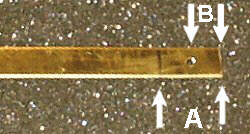
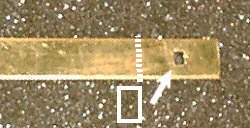
 Drill a hole of 2.5 mm at the indicated position. Drill a hole of 2.5 mm at the indicated position.
 Boor een gat van 2,5 mm op de aangegeven positie. Boor een gat van 2,5 mm op de aangegeven positie.
 Percez un trou de 2,5 mm, comme indiqué. Percez un trou de 2,5 mm, comme indiqué.
|
|
|
|
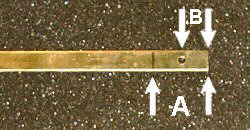
 File the hole until it's rectangular and the Märklinhook fits exactly, and cut off left of A at the former photo. File the hole until it's rectangular and the Märklinhook fits exactly, and cut off left of A at the former photo.
 Vijl het gat rechthoekig uit, tot de Märklinhaak er precies inpast en zaag af links van A op de vorige foto. Vijl het gat rechthoekig uit, tot de Märklinhaak er precies inpast en zaag af links van A op de vorige foto.
 Limez le trou jusqu'à ce soit rectangulair et le crochet Märklin s'emboit exactement et coupez à gauche d'A dans la photo anterieure. Limez le trou jusqu'à ce soit rectangulair et le crochet Märklin s'emboit exactement et coupez à gauche d'A dans la photo anterieure.
|
A=25 mm
B=12 mm
|
|
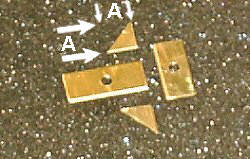
 Drill a hole of 3-3.5 mm at the indicated position and cut off left of A. By the way: for some locos A can be longer. Sometimes front and back of the loco can also differ. Drill a hole of 3-3.5 mm at the indicated position and cut off left of A. By the way: for some locos A can be longer. Sometimes front and back of the loco can also differ.
 Boor een gat van 3-3,5 mm op de aangegeven positie en zaag links van A af. Trouwens, bij sommige locomotieven kan A langer worden gemaakt. Soms is er ook verschil bij de voor- of achterkant van de lok. Boor een gat van 3-3,5 mm op de aangegeven positie en zaag links van A af. Trouwens, bij sommige locomotieven kan A langer worden gemaakt. Soms is er ook verschil bij de voor- of achterkant van de lok.
 Percez un trou de 3-3,5 mm, comme indiqué. et coupez à gauche d'A. À propos, par plusieurs locos on peut faire A plus long. Et parfois l'avant et la derrière da la loco sont differents aussi. Percez un trou de 3-3,5 mm, comme indiqué. et coupez à gauche d'A. À propos, par plusieurs locos on peut faire A plus long. Et parfois l'avant et la derrière da la loco sont differents aussi.
|
A=10 mm
|
|
 Solder the parts together. Solder the parts together.
 Soldeer de onderdelen in elkaar. Soldeer de onderdelen in elkaar.
 Soudez le tout ensemble. Soudez le tout ensemble.
|
|
|
|
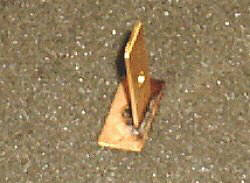
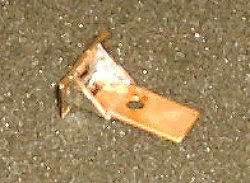
 Solder the standing part on the photo (later the horizontal part) about 1 mm off the edge of the frontplate, so this will come a little higher in front of the loco. Solder the standing part on the photo (later the horizontal part) about 1 mm off the edge of the frontplate, so this will come a little higher in front of the loco.
 Soldeer het rechtopstaande deel op de foto (later het horizontale deel) ongeveer 1 mm van de rand van de frontplaat, zodat deze iets hoger voor de lok komt te hangen. Soldeer het rechtopstaande deel op de foto (later het horizontale deel) ongeveer 1 mm van de rand van de frontplaat, zodat deze iets hoger voor de lok komt te hangen.
 Soudez la partie verticale dans la photo (plus tard ce sera la partie horizontale) environ 1 mm du côté de la plaque avant, de telle sorte que ça vienne un peu plus haute devant la loco. Soudez la partie verticale dans la photo (plus tard ce sera la partie horizontale) environ 1 mm du côté de la plaque avant, de telle sorte que ça vienne un peu plus haute devant la loco.
|
|
|
|
|
|
|
|
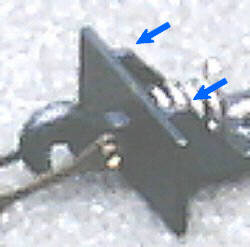
 File off the protruding points of the triangular pieces of brass. File off the protruding points of the triangular pieces of brass.
 Vijl de uitstekende punten van de driehoekige delen af. Vijl de uitstekende punten van de driehoekige delen af.
 Limez les pointes étendantes des pièces triangulaires. Limez les pointes étendantes des pièces triangulaires.
|
|
|
|
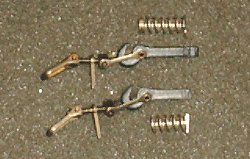
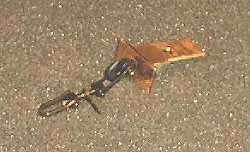
 Shorten the hook and the spring for the loco a little and... Shorten the hook and the spring for the loco a little and...
 Kort de haak en de veer voor de locomotief iets in en... Kort de haak en de veer voor de locomotief iets in en...
 Raccourtissez le crochet et le ressort un peu et... Raccourtissez le crochet et le ressort un peu et...
|
|
|
|
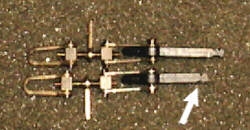
 ...cut 2 grooves in the sides to hold the spring. ...cut 2 grooves in the sides to hold the spring.
 ...maak 2 groeven in de zijkant om de veer in vast te zetten. ...maak 2 groeven in de zijkant om de veer in vast te zetten.
 ...faites 2 rainures dans les côtés pour retenir le ressort. ...faites 2 rainures dans les côtés pour retenir le ressort.
|
|
|
|
|
|
|
|
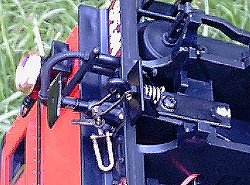
 Flatten the original LGB couplerbase and mount the new coupler. Flatten the original LGB couplerbase and mount the new coupler.
 Vijl de montagepositie voor de originele LGB-koppeling vlak en monteer je eigen koppeling. Vijl de montagepositie voor de originele LGB-koppeling vlak en monteer je eigen koppeling.
 Aplanissez la position de montage original et montez votre propre attelage. Aplanissez la position de montage original et montez votre propre attelage.
|
|
|
|
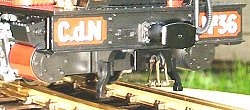
 It is possible that the handle is hanging too low, so see to it that it is turned upwards or horizontal, like on the picture It is possible that the handle is hanging too low, so see to it that it is turned upwards or horizontal, like on the picture
 De draaihendel kan te laag hangen. Zorg ervoor dat deze naar omhoog of opzij is gedraaid, zoals op de foto. De draaihendel kan te laag hangen. Zorg ervoor dat deze naar omhoog of opzij is gedraaid, zoals op de foto.
 C'est possible que la manette vient trop bas. Puis tournez la en haut ou à la coté, comme dans la photo. C'est possible que la manette vient trop bas. Puis tournez la en haut ou à la coté, comme dans la photo.
|


